

I’m pretty sure that looking at this pop-up for the first time would be intimidating. This is a simple method to extract the SHA1 fingerprint right from Android Studio without using keytool. If you have no idea what I’m talking about, read along and understand the whole process.
Steps to obtain the SHA1 fingerprint is at the end of this post.
What is a signing certificate ?

Android requires that all apps be digitally signed with a certificate before they can be installed. Think of it like labeling your app as your own. You make a label with your name and stick it on your app, this ensures you are the rightful developer of the app. Only with the same signing certificate you can roll out future updates for your app, and for that reason you should never lose this certificate.
To further protect your app, this certificate is coupled with a digital key so that it remains reasonably unhackable.
What is a key store ?
The key store is basically a file containing all your cryptographic keys. All your certificates and corresponding keys are saved in this file encrypted.
There are 2 types of keystores
- Debug key store : This key store is generated by the Android SDK so that you don’t have to sign the app each time you deploy it for testing.
- Release key store : However you cannot use the debug key store when you want to publish the app. You have to generate your own release keystore and sign your app with a release key to publish your app.
How to create a release key ?
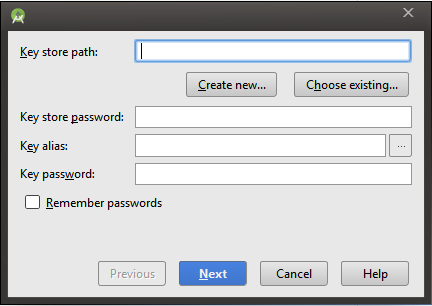
Open up Android Studio. Goto Build > Generate Signed APK
First let’s create a new key store. Click on Create new
A new dialogue box pops-up.
Key store path: Make sure you give a secure location. You do not want to lose it. I repeat, you do not want to lose it!
Key store Password: This password is for the key store file, remember you can use the same keystore for storing all your keys for your various app(s). So this is like a master password.
Key Alias: Name this as <your app name>+’Key’ or something. This is specific to this signing key for this app. ( This is the equivalent of a key in a hashtable )
Key Password: This password is specific to this signing key for this app. You can very well use the same password used for the keystore.
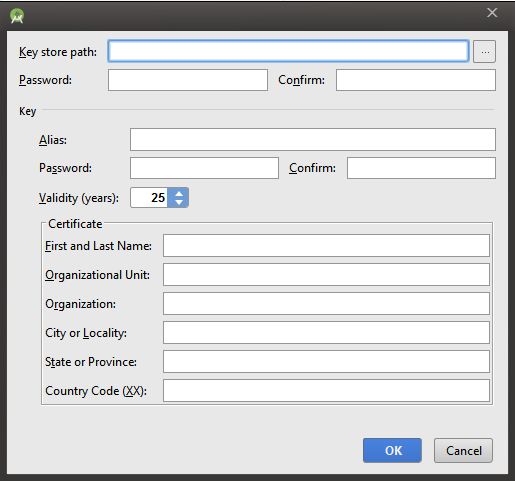
Validity: Give it say, 100 years!
Certificate: You are required to fill in at least one entry in this.
Click OK and proceed with the build.
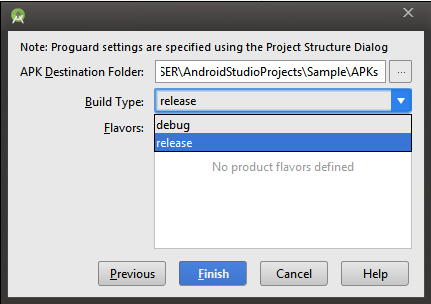
Make sure you choose the Build Type as release and click Finish
Deploy in release mode
The release key signed APK is generated, but this does not deploy it on the device/emulator like it normally would. To do that, Goto File > Project Structure
In the left, under Modules, choose android
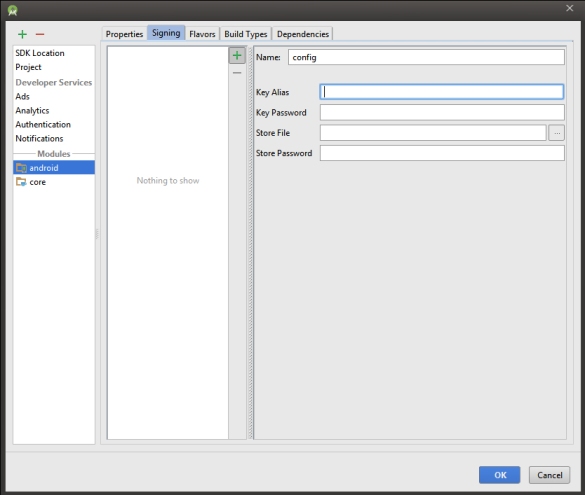
Choose the Signing tab, click on the green + button and fill in the details, which you gave when you created the release key. The default configuration name is config. Let it be.
Go to Build Types, Choose release
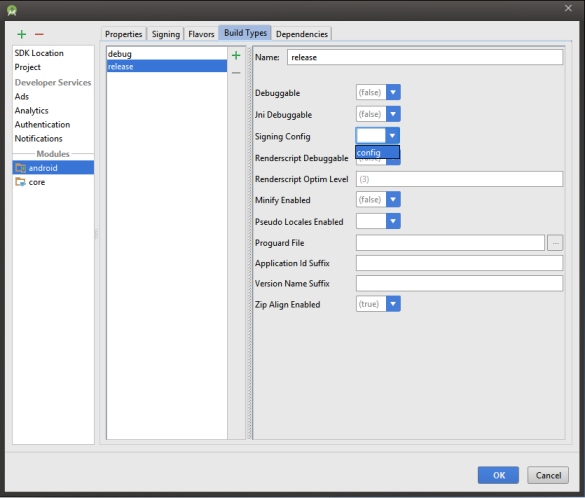
In the Signing Config option, choose config. Click on OK.
To use the release signing key when deploying the app, click on the tiny square found at the bottom left of Android Studio and choose Build Variants
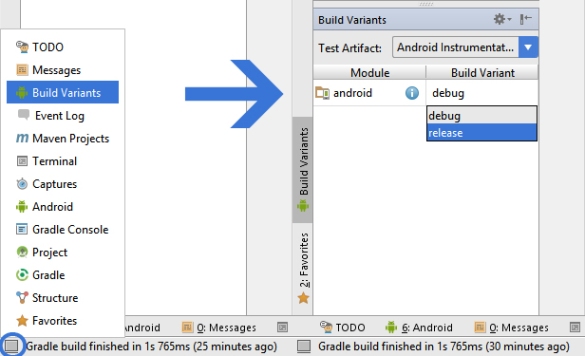
In the Build Variants sidebar, choose release. From now on, whenever you deploy the app, the signed version with your release key is pushed on to the device/emulator.
But when you deploy it for the first time, you will encounter this error.
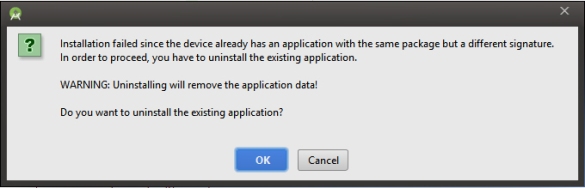
This is because of the conflicting signatures for the same package. Click on OK and the release build will be pushed.
What is a SHA1 fingerprint ?
SHA1 stands for Secure Hash Algorithm One. A one-way cryptographic function that can be used to act as a ‘signature’ for a sequence of bytes. It is very unlikely that 2 different byte sequences would produce the same value (though not impossible). So instead of shipping the app with the entire key store and uploading a copy of it to the playstore, we use this cryptographic signature to easily validate the authenticity. Read more about SHA1 here.
Obtain the SHA1 fingerprint
Important : Run your app in release mode once before proceeding.
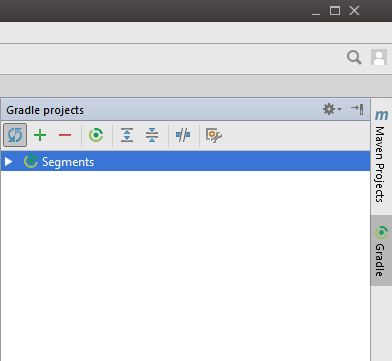
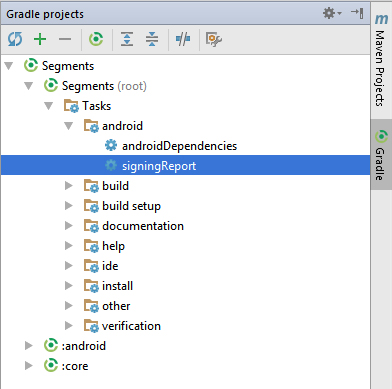
Click on Gradle ( or SBT ) found on the top right of Android Studio. First time you open it, it’ll be blank, click on the refresh button and it’ll list the name of your project ( My project name is Segments ).
Expand the tree like this and double click on Signing Report
Voila! you find the SHA1 fingerprint of both the release key and the debug key.
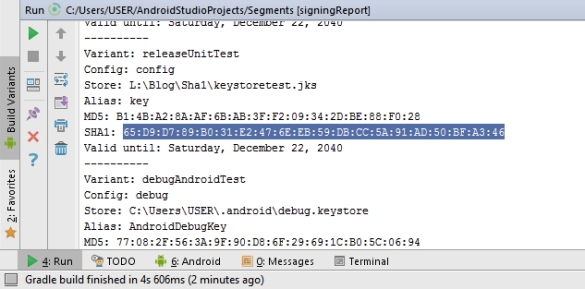
You can even use the debug key SHA1 for testing Google API services. Just make sure that the app accessing this API is signed with the same key as that provided to authorize the app.
An unexpected error occurred. Please try again later. (480000x)
You might get this error when you submit the SHA1 fingerprint, this happens when you use the same fingerprint+package combination as a new linked app. Go to your developer console and delete any duplicates projects that you may find. Deletion takes 7 days though.
