48 hrs in Augmented Reality

I participated in my first European Hackathon TechFestMunich on September 2017. This was unlike any of the other previous hackathons I’ve attended back in India and I did not have my trusty teammate Arjun with me. Also, I finally got to work on Augmented Reality.

TechFestMunich is hosted by UnternehmerTUM, the center for innovation and business creation at the Technical University of Munich, Germany. I think this is one of Europe’s hottest hackathons after HackZurich. This year they chose only 300 participants most of whom were working professionals. Since the venue was a business incubation center, their labs were loaded with tech!

Prior to the event, the organizers setup a Slack channel to discuss the projects and find potential teammates. I didn’t really find any of the offered projects interesting. Meanwhile some of the other contestants were pitching their own ideas on Slack hoping for people to join them. One of them was André Kovac, he was pitching some really intriguing projects on Augmented Reality(AR) to visualize equations. I’ve always wanted to work on AR but I never really got the opportunity or maybe I just never wanted to let go of Android and since my teammate wasn’t around either, I figured I’d take a shot in the dark with this one! So I pinged André and we decided to team up.

DAY 1 –“It’s going to be really difficult to build this in 2 days!”

I met up with André right after breakfast and we started discussing our game plan. This was when I came to know that he hadn’t actually worked with AR as well! So we needed to know what AR could and could not do before even thinking about the application. So we went to attend Microsoft’s workshop on Mixed Reality using the Holo lens, to understand what it was all about.

There’s Virtual Reality and Augmented Reality, so what’s Mixed Reality?

I’ll try to put this in the best way that I can. Virtual Reality is when you don’t see the physical world, you are completely inside a virtual environment. The experience that you get with Google Cardboard and Oculus Rift are examples of Virtual Reality. Augmented Reality is when you see virtual objects on top of the physical world. Mixed Reality(MR) is also Augmented Reality but they are much more life-like, the virtual objects placed in Mixed Reality are more accurately anchored within the physical world and are more interactive with the physical world, the best example is Pokémon Go. AR and MR are essentially conveying the same idea. The term ‘Mixed Reality’ was made up by Microsoft in an effort to make it less confusing to the public.

UnternehmerTUM Techfest

The Holo lens is Microsoft’s vision for Augmented Reality, they call it the world’s first self-contained holographic computer. It can overlay graphic content that is nearly opaque on top of your vision. It looks pretty rad but it’s not the most comfortable thing to wear. The team from Microsoft demonstrated the Holo Lens using a simple application built in Unity where you place an object in the physical world, you walk away from it and come back to find that it’s still there.

THE IDEA

The idea was to create an AR application to teach sign language. Back in 2016, my mentor Prof. Geetha suggested a project for my Bachelor’s Thesis, it was to build an Android application that could teach sign language using a 3D avatar, the application should be able to convert text into sign language gestures. But then I never took up the project due to limited resources and time constraints. However, with the virtually unlimited resources available at the hackathon, it seemed like the best place to implement this idea.

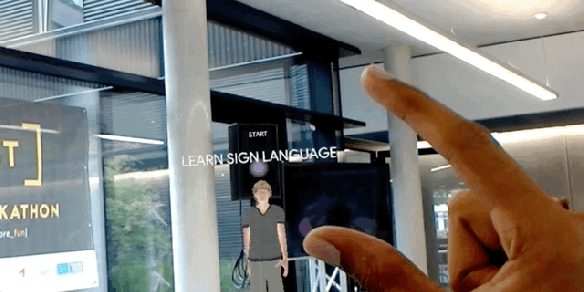
The added advantage with AR is that the user would be able to view the gestures from his own perspective. i.e when learning sign language, we require an instructor to show us these gestures in front of us, but because the instructor’s left now becomes our right and vice versa, this causes a difficulty to comprehend compound gestures involving both the hands. With AR, we can augment the instructor’s hand on top of our normal vision without having to invert the perspective, so that we can see for ourselves how our hands should move right in front of us. You can see below how I’m easily able to follow the virtual hand. (Note that the virtual hand is not following my gesture!)

perspective

I discussed this idea with André and he liked it too. We met Rafael, he was the coordinator of Roboy and someone suggested that we take this idea to him to see if it was plausible. After hearing the idea, he said it was very good and he liked it. Then he asked us a few questions.

-Which one of you is the expert in sign language?

-We looked at each other and told him we didn’t know sign language.

-Okay, so which one of you has worked on AR before?

-Again, we looked at each other and told him we haven’t worked on AR before.

-Then it’s going to be really difficult to build this in 2 days!

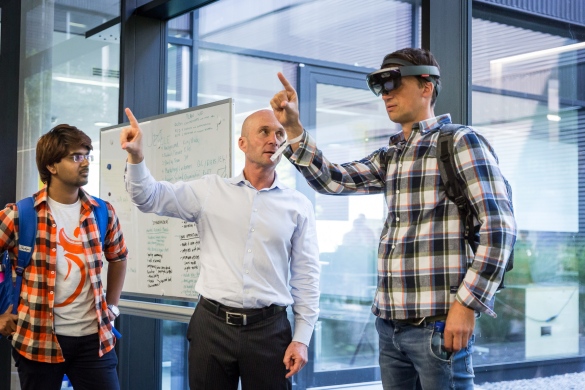
He then informed us about a Unity workshop that was happening in the afternoon, conducted by two game developers and he told us that they have the motion capturing suit which we could use to record the sign language gestures, that was just what we needed. The first thing we did was to reserve our workspace, the crew had already setup 2 workstations for the Holo Lens that had all the necessary tools pre-installed. We laid our jackets, backpacks and coffee cups just to give the impression that it was taken! We then went to the hardware library and got our own Holo Lens and someone happened to take a picture of it.

UnternehmerTUM Techfest

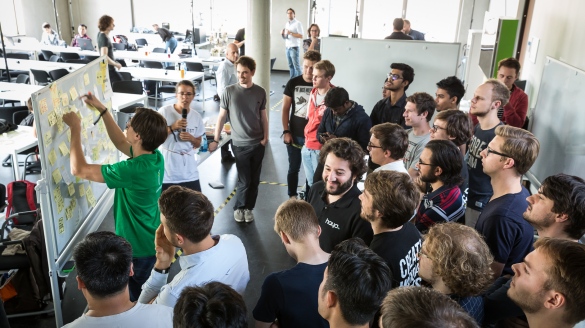
Next up was the ideation phase for the AR/VR projects. They made us discuss our ideas with others in pairs and in groups. After a couple of rounds of that, we were asked to jot down our ideas on a sticky note and have them put on a board. We then had to pitch the idea in front of everyone in under 30 seconds. This was when Franz and Saqib joined us.

UnternehmerTUM Techfest

The Unity workshop was really helpful. They showed us how they animate 3D avatars in their games using a motion capturing suit. After the workshop, we pitched the idea to them, they were quite impressed. They offered to help us with recording the sign language gestures, they did not bring the complete suit for the workshop so it was not capable of picking finger movements just yet, but they promised to bring it the next day.

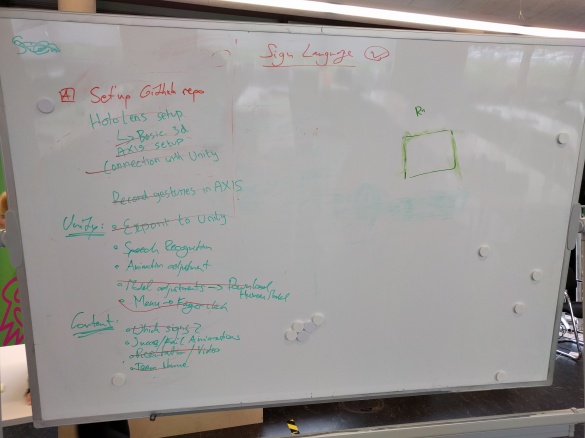
Then we started scribbling a roadmap and split the tasks. Andre and Saqib were going to setup the Holo lens and deploy a sample application. Franz was going to learn some sign language gestures. Meanwhile I returned home to learn Unity.

IMG_20170910_155549

DAY 2 – Sleeping at 5 in the morning

I knew this day was going to be the game changer, so I came in prepared, packed an extra pair of clothes, a toothbrush and some fruits. Andre and Saqib had already deployed the sample application on the Holo Lens that displayed a 3D cube. Then Saqib showed me the ritual that had to be performed every time to deploy an application from Unity to the Holo lens. It involved a couple of steps for configuring the build with some special parameters, generating the build, running that build on Visual Studio and then deploying it with on the Holo lens. I did not ask a single question!

The game developers showed up, it was time for Franz to suit up. We were using the Perception Neuron motion capturing suit, it’s widely used in animated movies and games. The suit pairs up with a bluetooth hotspot that interfaces to the computer via USB to their software AXIS Neuron.

suit

First up, the suit had to be calibrated by standing upright, sitting down, bending the knees etc. This was when we identified a weird issue with the avatar’s movements. Since we needed to capture only the hand movements, we only placed the sensors on the upper body, however this made the avatar’s movements seem unnatural.

3

We then placed the sensors on his legs and after a couple of calibrations, we were good to start recording some gestures.

5

This was really the most coolest and fun part of this whole project. We recorded the gestures for a few words, sentences and also a waiting animation for when the avatar would be idle.

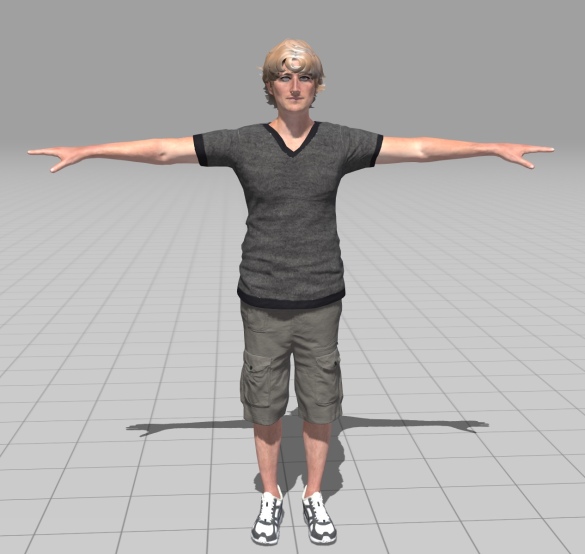
Then we had to apply these animations to a 3D human avatar in Unity. Fortunately the AXIS Neuron software could export the animations in fbx format which is accepted by Unity. We started looking for 3D human avatars, a google search did not do any good! Most of the what we found were either not rigged or expensive or plain naked and we were not planning on showing a naked man on stage! (A rigged model is one that has its joints defined like the elbow joint, the knee joint etc. These joints have to match with the joints defined in the recorded animation, only then the animations can be applied. A standard human rig is called the humanoid rig) Unable to find any rigged human avatar I approached one of the game developers and he pointed me to the perfect website that had free rigged 3D human avatars and I chose this dude because he was the only neutral looking character of the lot.

remy

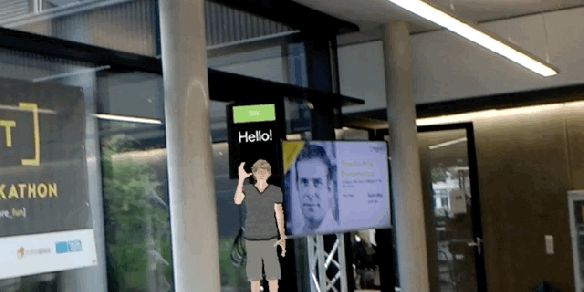
Now that we had everything, it was my job to put everything together. Franz started working on the presentation and Saqib stayed to help me. The proposed flow was, the avatar would show the gesture for a sentence/word standing in front. Then when the user clicked on a  “TRY” button, the camera would shift to the avatar’s perspective and the animation would be replayed. I put together a simple UI and started off by writing a state machine which I usually use in my games. It triggered the animations on the human avatar one by one using a button click.

When we deployed the application into the Holo lens, we could not click the button using the system wide click gesture. We later found out that a package had to be manually added, after referring a couple of forums we were able to get it working.

click

Once the avatar could show the gestures, the next part was to replay the gestures from the avatar’s perspective. This meant we had to move the camera from its initial position to the avatar’s face. André pointed out that the camera should animate its way to his face rather than changing its angle abruptly, so that people could understand what was happening. After about an hour, we could achieve what we were hoping for.

cameraAnimation

Then we had to add the camera animation and reverse animation in between each state which at one point got too confusing. I realized that I was over-complicating it with too many redundant states, so I wrote everything down on a piece of paper and had Saqib follow the states along with the application. At close to 5am we were done! Here’s the working demo.

DAY 3 – THE PITCH

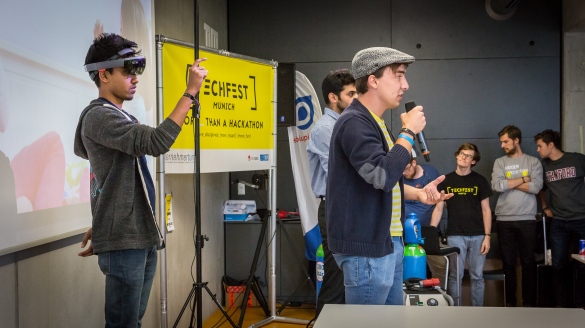
Franz prepared a fantastic presentation for the pitch, he came up with the name LARS for the 3D avatar, in short for Augmented Reality Sign Language teacher (yes, we know the letters don’t make sense). We started discussing our presentation strategy, our plan was that Franz and Saqib would start off by selling the idea, Andre would then explain how it works while I present the live demo wearing the Holo lens on stage. Microsoft provides a web-based portal to stream the Holo lens display in real time over Wi-Fi and we were going to use it to show the live demo.

We applied for two categories so we got to make two pitches. The first category was for all kinds of innovative projects, and this pitch was perfect, the audience were totally sold! They were completely immersed in the live demo and we got a lot of cheer and applause.

UnternehmerTUM Techfest

We were up for the second pitch, this was the pitch for the VR/AR category, this was the one that mattered. Everything went according to plan and it was time for the live demo. LARS showed the first gesture and it was time for me to try it, I clicked the “TRY” button, the camera shifted its position to LARS’s perspective and his hands were showing the gesture perfectly but I noticed there was no response from the crowd, when I looked back into the screen, his hands were not appearing in the stream even though I could see it on the Holo lens. So I switched to the next gesture and again his hands did not appear!

UnternehmerTUM Techfest

UnternehmerTUM Techfest

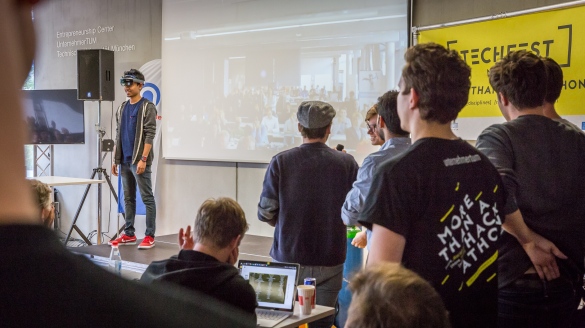
That was such a bummer and it ruined the whole presentation. Later we discovered that the issue lied within the stream, it was buggy when the network was poor, it sometimes failed to render all the elements.

We couldn’t make it to the finals after that disaster but many who saw our first pitch and witnessed our all-nighter coding session talked to us about the project and told us that they hoped we would win. That was the really the most rewarding moment! I was really amazed at how far we could get without even having any prior experience in AR. We couldn’t have done it without the help of so many people especially Rafael and the two game developers whose names unfortunately I cannot recollect. It was really interesting to work on AR and I can’t wait to get my hands on the Holo lens again!

Untitled

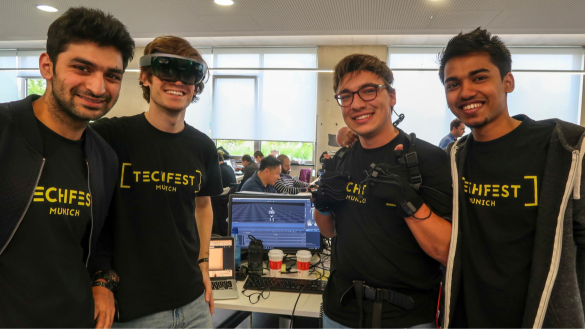
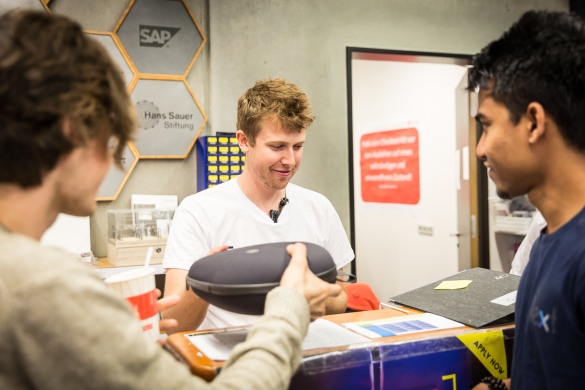
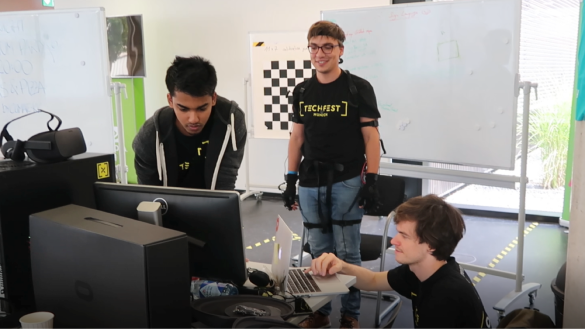
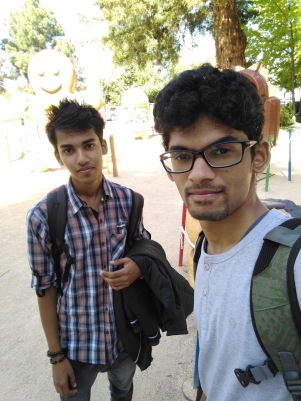
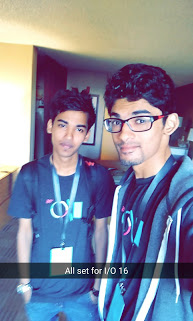
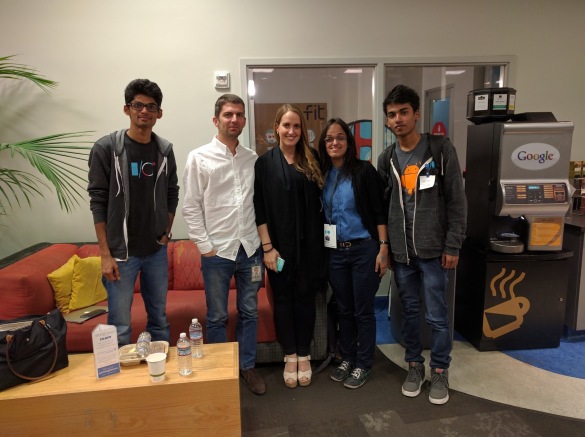
Saqib, André, Franz and me

Google I/O, MKBHD and how I missed a selfie with Sundar Pichai

Google I/O is the company’s annual developer conference where they showcase new products they’ve been working on over the past one year. The “I/O” traditionally stands for Input/Output, and in here it also stands for Innovation in the Open. The event features highly technical sessions and talks to give developers a first hand experience and the technical know-how to start developing for their new products. Google I/O brings together developers from across the globe. It’s a great way to meet the developer community. This year’s I/O was hosted in Google’s own backyard at the Shoreline Amphitheatre in Mountain View, California with over a staggering 7000 attendees!

Check out the highlights of this year


APPLIED CS WITH ANDROID

Google I/O is mostly invite-based, the number of tickets open to the public is really limited and these tickets are sold via lottery system. They can cost around 900$ or 300$ for students. Google issues the rest of the tickets through its various communities and programs. I am part of Google’s program called Applied CS with Android. It’s a course designed for university CS students where they practically apply concepts of Computer Science using Android as a platform. This course is delivered by a student facilitator within the college and I was chosen as the student facilitator for mine. Read here to know more about this program.

both

Through the program, they had 2 tickets to offer across the facilitators in India, me and a senior, Muthu Ramakrishnan (on the right) from SRM university got selected through an application process. He’s the boss that tried to bring Netflix into India using YIFY torrents, read about him here. I will be referring to him as “the boss” from now 😀
 

INTERNATIONAL DATE LINE

It was my first visit to the United States and the first noob moment struck when I received my flight tickets, it said the departure was at 4 am on 15th May and the arrival was at 2 pm on the same day, but the total journey took around 24 hrs.

khtm4

and the boss didn’t give it out so easily 😀

dateLine

Well of course, the date line! Travelling towards the East, when you cross the international date line, you would gain a day.

dateLineRoute

The San Francisco timezone in particular is 12 hrs and 30 mins behind India. So yeah, essentially we would be travelling back in time just like the boss said 😀
 

BADGE-PICKUP

It was badge-pickup day, the keynote seating was to be pre-assigned on a first come, first serve basis. The badge pick-up began at 7 am, but we were not going to miss out Sundar Pichai’s keynote from the back, so me and the boss got up early by 5. We took an Uber to Shoreline Amphitheatre and reached there by 5:30 only to find people had been standing there from 4:30! Slowly the queue started to build up, by 6 the queue was stretching across 2 blocks. At 7, the gates opened and we were finally in.

IMG-20160517-WA0015

We received our badges and some swag, this included a T-shirt, a sipper, a pair of sun glasses and a Google cardboard.

IMG_20160703_133441

It was time for some photographs in front of the Google logo. Google had their logo put up in almost all their buildings and signs but most of these were the old ones.

google-logo-2

The boss insisted that we click a picture in front of the new one. So we both grabbed a G-bike (G-bikes are these colorful girly bikes you find lying all around the Google campus) and started wandering around the Google campus in search for the new one.

gbike

We finally came across the updated logo at 1098 Alta Avenue.

newlogo
 

KEY-NOTE

Snapchat-794565494586146779

We arrived leisurely the next day because we had guaranteed spots in the front or so we believed. When we got there, there was a huge crowd of people, almost all of the 7000 attendees waiting in line to grab the best seat possible.

IMG-20160518-WA0002

We met up with some fellow developers from India who came through the Google-Developer-Group program, we were all standing in line together.

IMG-20160518-WA0004

Also waiting in line was Marques Brownlee, the dope tech-reviewer popularly known as MKBHD. I rushed through the crowd to meet him. I was grinning the whole time like a little girl, I couldn’t help it, I was starstruck and he said “Take it easy” 😀

IMG_20160518_090053

The keynote gates opened and we managed to grab a good seat. The atmosphere was electric with all the nerds in one place 😀

IMG-20160518-WA0011

Sundar Pichai came to the stage, the Indian inside me glistening with pride as the whole crowd cheered for him!

sundar

He began talking about the advancement in the field of Artificial Intelligence, Machine learning and how they are helping power Google’s various apps. For example, Google Photos is unlike any other photo gallery app, it will identify key-aspects from your pictures like people, animals, objects, places etc. from which you can retrieve appropriate image results when you search for queries like “cat”,”beach” which would find images containing cats and photos taken on the beach from your albums.

Watch the full keynote here. Here are some of my favorite announcements from the key-note.
 

GOOGLE HOME

googleHome

Similar to Amazon’s Echo, Google has released a new voice-assistant called Google Home. With the form factor of a speaker, it houses a mic and connects to all chromecast devices and even nest devices. It comes with all the goodness of Google built right into it, synced across anything and everything, you can use it for search, playing music, booking movie tickets, home-automation and what not! Talking to an assistant, you would expect it to remember conversations and they’ve done just that. If you ask the assistant “Who is Chuck Norris”, followed by “When was he born ?”, speech assistants like Siri would fail. But with the improved Google Now in the assistant, it remembers the “he” refers to Chuck Norris and gives his birthday!

Chuck-Norris-Approves-Meme-10
 

ALLO

Google brings a new messenger app called “allo” (not hello).  It is in all aspects similar to WhatsApp, except for the fact that it has an AI built into it. Anyone who has used the Hike Messenger would be familiar with a bot called Natasha, it served as a bot you can have a conversation with, get details about movies, weather etc. But Allo takes it to a whole new level, it’s listening to your conversations all the time. Let’s say you are talking about going for dinner at an Italian place and BAM! Allo brings up a list of Italian restaurants nearby, right into your chat screen.

allo1

So you get the idea, you no longer have to go outside the app and Google for something, it’s all accessible from within. Allo also gives you smart replies (intelligent replies based on the context), that means you no longer have to type.

allo2

Interestingly, it also lets you beef up the text and smileys so you can convey more emotions.

smiley

Overall it’s an app designed to ease out your chatting experience. But what about privacy ? Would you let an A.I listen in on all your conversations ?  Here‘s what the infamous Edward Snowden has to say.
 

DUO

Duo is a new mobile-only video chatting app that competes with Apple’s facetime. The only feature that makes duo stand out is the knock-knock feature, when somebody calls, you can already see through their camera before you even choose to pick-up the call.

duo
 

DAYDREAM

Virtual Reality is now built right into Android with the last version Nougat. You can simply switch into VR mode, wear your cardboard and immerse into a new UI built just for VR. They’ve also released designs for a new bluetooth remote which would act as the controller for the VR mode, like a tiny Wiimote.

remote

The name “Daydream” was already taken in Android, the screensavers were originally called Daydream. This got me pretty confused during the key-note. Since the original Daydream was never a high-profile feature, they decided to rename it back to plain old “screensaver”.
 

INSTANT APPS

This was one of my favorite announcements in the I/O. Instant apps lets you instantly run an app without installing it! This means you can try out an app before you install it. But isn’t that the same as installing an app and then uninstalling it? Nope, when you run an instant app you are not downloading the whole app, rather just a part of the app to demonstrate a feature, that’s why it launches instantly. That’s not all, you can use just a part of the app when you require it. Let’s say you wanna buy a pair of pants, the website offers you an instant app rather than the whole e-commerce app. You purchase the pair of pants, finish the transaction and you’re done with the app. You can later choose to install it or remove it. This is really helpful when you want to use services that you don’t often rely on.
 

WEAR 2.0

androidweartwooh-100661858-primary.idge

With Android Wear 2.0, you no longer need to carry your phone to use your smartwatch. Apps can now run separately on the watch. You can even type back replies using a tiny keyboard in the watch, though you can still sync it your phone and use the phone keyboard instead to input fields ( but that beats the whole purpose of a smartwatch doesn’t it o.O )
 

DEVELOPER SESSIONS

queue

After the keynote, the developer sessions were underway. Google did not think this through. They setup domes everywhere to host the sessions, but these could fit only a few people. I could not go to the first session I had planned to go to because it got full. When people started realizing this, they prioritized their sessions, skipped some to camp out in front of the next one to guarantee a seat. The lines started growing really long, the ones at the back not knowing when the capacity was full. So they introduced a ticketing system, everyone who got the ticket was guaranteed a spot, the rest had to move on! So I strictly prioritized for the Project Tango sessions.

All the sessions are available on YouTube
 

PROJECT TANGO

Part of Google’s ATAP (Advanced Technology and Projects) division, project Tango is a new technology that gives your phone and tablet, the ability to understand their position relative to the world around them, i.e the sense of space. In layman’s terms, if you move from point A to point B, the Tango device is capable of retracing it’s path back to point A. This technology allows the device to precisely measure the dimensions of objects and understand planes when you point your camera at something, allowing the device to render 3D objects in real time giving you augmented reality.

Read more about project Tango here

Check out this demonstration to truly understand what Tango is capable of! This was my favorite demonstration in Google I/O, I was spellbound, so was the whole crowd sitting there.

On one hand you have the immersive experience of VR and on the other the capability to render the world you see the way you want, combine these two and you no longer need to live in actual reality 😀
 

SELFIE WITH SUNDAR PICHAI

In the evening, they had concerts inside the amphitheatre. I forgot to wear my jacket, it was quite chilly to the point where it became unbearable. So me and the boss got off from our seats to get me a hoodie from the store. Near the exit, we saw people crowding, amidst them was the CEO of Google, Sundar Pichai. Again I was starstruck! I didn’t know how to react but the boss jumped through the crowd and managed to click a quick selfie and we later discovered that I almost ended up in it too (right between them) 😀

IMG_20160518_202222-2
 

MEET-UP

IMG_20160520_202736

After Google I/O we met up with Sebastian and Aida, they are heading the Applied CS with Android and other developer relation programs at Google. Riya who was part of the pilot program for Applied CS also joined us. They took us around the Google campus. We even played volleyball inside, it was super fun!

Google I/O was an incredible experience, the kind of people you meet here and the exposure that you get is beyond comprehension. You get to meet the experts one-on-one and ask your burning questions, you get expert advice and suggestions to improve your products and best of all, you get to meet awesome people like you and make new friends! Now I realize why they call it “Innovation in the Open”. I thank Google for having me, hope to be back next year 🙂

How to setup Google Play Game Services in LibGDX using Android Studio

Hands down, one of the most nerve wracking API integration I’ve ever done! Mostly due to the jargon-filled Google documentation and the lack of  libGDX-specific tutorials. Hopefully, this post would give you more clarity to implement the same.

1) Create a new Game Service

Head over to your dashboard and select Game services

Note: You don’t need to have your game added under All applications in order to test Play Services.

Click on Add new game. Choose I don’t use any Google APIs in my game yet tab and Fill out your game name and category.

  • Game details: Make sure to fill in all mandatory fields like description, graphic assets etc.
  • Linked apps: Choose Android, fill in the package name ( This package name should match with the one in your AndroidManifest file ) To properly authorize your app, follow my guide
  • Events: This is not mandatory, leave it for now.
  • Achievements: It is mandatory that you have at least 5 achievements in your game. If you don’t plan on having them just leave them unimplemented in your game but make sure to fill these up and obtain the tick mark.
  • Leaderboards: You can add as many leaderboards as you want depending upon your game.
  • Testing: Make sure you have filled in all the necessary fields and the game service is ready to be tested. Add testers: Only the users you specify will be able to use the game service when it is unpublished, make sure to add an account other than your dev account as the dev account may not work sometimes.
  • Publishing: It’s better to publish it with the whole game when it’s ready. You can still test all the features with the test accounts.


2) Install Play Services packages

Untitled-9

Open up SDK Manager in Android Studio, ( Click the button next to the AVD manager in the top toolbar ) click Launch Standalone SDK Manager

Scroll down to the Extras section and make sure these 2 packages are installed and updated to the latest :

  • Google Play services
  • Google Repository


3) Add BaseGameUtils Library

Didn’t we just add the Play services packages, what is this for?

This repository contains a lot of sample projects including libraries, each one implementing a different play service. So that means they’ve written all the code  for you! You don’t have to talk to the API and handle all those lousy exceptions, you just have to add it as a library module for your project and call the necessary methods. Good job Google 😀

Here’s the repository, Clone it or Download it as ZIP.

Extract it inside your project folder. Inside the extracted folder, open the  BasicSamples folder and you’d find all the sample projects. These are only for reference, you essentially need the libraries folder.

Open Android Studio, goto File > New > Import Module

Point the Source directory to BasicSamples\libraries\BaseGameUtils


4) Add dependencies

Now that we’ve added all the necessary packages and libraries, we need to explicitly tell our build system ( Gradle ) to compile them. In the project tree on the left, under Gradle Scripts,

Open the build.grade(Project: <Project name>) file, add these 2 lines

project(":android") {
    ...
    dependencies {
        ...
        compile 'com.google.android.gms:play-services-games:8.4.0'
        // 8.4 is the latest as of now, keep it updated
        compile project(':BaseGameUtils')
        ...
    }
    ...
}

If you are using other play-services APIs, add them in the dependencies list. But if the number of method references in your app exceeds the 65K limit, your app may fail to compile, in that case you need to enable multidex support.

Open the build.gradle(Module: android) file, add these 2 lines

android {
    defaultConfig {
        ...
        multiDexEnabled true
        ...
    }
}

dependencies {
  ...
  compile 'com.android.support:multidex:1.0.0'
  ...
}

Let Gradle sync the project.


5) Update Android Manifest

We’ve linked our project with the play services api, but our game still doesn’t know which game service to connect to and obviously the game would have to access the google play game servers over the internet. For that, in the Android Manifest file, we need to pass in the details of our game service and obtain permission to access the internet.

Go back to your dashboard. Open up Game services > Leaderboards and click on Get resources. This will pop-up a window with XML content, copy  it. Inside your android Project, go to res > values and create a new Values XML File, name it ids and paste the contents inside it. It’ll look something like this.

<?xml version="1.0" encoding="utf-8"?>
<resources>
  <string name="app_id">767948611622</string>
  <string name="achievement_dum_dum">CgkIpsC36qwWEAIQAw</string>
  <string name="leaderboard_highest">CgkIpsC36qwWEAIQAA</string>
</resources>

Open up AndroidManifest.xml and add these 4 lines

<?xml version="1.0" encoding="utf-8"?>
<manifest xmlns:android="http://schemas.android.com/apk/res/android">
    ...
    <application>
        ...
        <meta-data android:name="com.google.android.gms.games.APP_ID" android:value="@string/app_id" />
        <meta-data android:name="com.google.android.gms.version" android:value="@integer/google_play_services_version" />
    </application>
    ...
    <uses-permission android:name="android.permission.INTERNET" />
    <uses-permission android:name="android.permission.ACCESS_NETWORK_STATE" />
</manifest>


6) Implementation

Now that everything is set up, we are ready to implement play services. Since all our game classes are inside the libGDX core project, we can’t directly call these methods because these are Android methods. So we create an interface inside our core project and implement this interface inside the Android Project. Makes sense ?

So inside the core Project, create a new interface and call it PlayServices. In this example we will implementing these basic play game services.

public interface PlayServices
{
    public void signIn();
    public void signOut();
    public void rateGame();
    public void unlockAchievement();
    public void submitScore(int highScore);
    public void showAchievement()
    public void showScore();
    public boolean isSignedIn();
}

Inside the android Project, open up the default Activity, in my case it is called AndroidLauncher.java

Declare these 2 members inside the class

private GameHelper gameHelper;
private final static int requestCode = 1;

Inside the onCreate() method, initialize these members

gameHelper = new GameHelper(this, GameHelper.CLIENT_GAMES);
gameHelper.enableDebugLog(false);

GameHelper.GameHelperListener gameHelperListener = new GameHelper.GameHelperListener()
{
    @Override
    public void onSignInFailed(){ }

    @Override
    public void onSignInSucceeded(){ }
};

gameHelper.setup(gameHelperListener);

Now we want play services to start automatically when the game begins and stop when the game exits, also we need to handle exceptions when the user fails to sign in. This is where the BaseGameUtil libraries come in, it takes care of all this, we just have to override our Activity methods and pass it on to them.

 @Override
    protected void onStart()
    {
        super.onStart();
        gameHelper.onStart(this);
    }

    @Override
    protected void onStop()
    {
        super.onStop();
        gameHelper.onStop();
    }

    @Override
    protected void onActivityResult(int requestCode, int resultCode, Intent data)
    {
        super.onActivityResult(requestCode, resultCode, data);
        gameHelper.onActivityResult(requestCode, resultCode, data);
    }

Now, let’s implement the interface we created.

public class AndroidLauncher extends AndroidApplication implements PlayServices

Define the implemented methods like this.

    @Override
    public void signIn()
    {
        try
        {
            runOnUiThread(new Runnable()
            {
                @Override
                public void run()
                {
                    gameHelper.beginUserInitiatedSignIn();
                }
            });
        }
        catch (Exception e)
        {
             Gdx.app.log("MainActivity", "Log in failed: " + e.getMessage() + ".");
        }
    }

    @Override
    public void signOut()
    {
        try
        {
            runOnUiThread(new Runnable()
            {
                @Override
                public void run()
                {
                    gameHelper.signOut();
                }
            });
        }
        catch (Exception e)
        {
            Gdx.app.log("MainActivity", "Log out failed: " + e.getMessage() + ".");
        }
    }

    @Override
    public void rateGame()
    {
        String str = "Your PlayStore Link";
        startActivity(new Intent(Intent.ACTION_VIEW, Uri.parse(str)));
    }

    @Override
    public void unlockAchievement()
    {
        Games.Achievements.unlock(gameHelper.getApiClient(),
         getString(R.string.achievement_dum_dum));
    }

    @Override
    public void submitScore(int highScore)
    {
        if (isSignedIn() == true)
        {
            Games.Leaderboards.submitScore(gameHelper.getApiClient(),
             getString(R.string.leaderboard_highest), highScore);
        }
    }

    @Override
    public void showAchievement()
    {
        if (isSignedIn() == true)
        {
            startActivityForResult(Games.Achievements.getAchievementsIntent(gameHelper.getApiClient(),
             getString(R.string.achievement_dum_dum)), requestCode);
        }
        else
        {
            signIn()
        }
    }

    @Override
    public void showScore()
    {
        if (isSignedIn() == true)
        {
            startActivityForResult(Games.Leaderboards.getLeaderboardIntent(gameHelper.getApiClient(),
             getString(R.string.leaderboard_highest)), requestCode);
        }
        else
        {
            signIn()
        }
    }

    @Override
    public boolean isSignedIn()
    {
        return gameHelper.isSignedIn();
    }

But how can the core Project reference these methods ? For that we need to pass an object of this activity to the core Project class. Here MainGame is my core Project class, I’m passing an object of AndroidLauncher which is my default Activity.

initialize(new MainGame(this), config);

Now inside the MainGame class, we create a constructor to pass this reference to the interface PlayServices

public static PlayServices playServices;

public MainGame(PlayServices playServices)
{
    this.playServices = playServices;
}

My MainGame class has minimal functionality, it only sets the MainMenu screen, and I want to be able to call the PlayServices functions from the MainMenu screen. To do that, pass the object of MainGame when you set the screen.

setScreen(new MainMenu(this));

In the MainMenu class, create an object of MainGame and use a constructor to pass this reference

public static MainGame game;

public MainMenuScreen(MainGame game)
{
    this.game = game;
}

Now using this object you can call any of the PlayServices interface methods like this.

game.playServices.signIn();
game.playServices.signOut();
game.playServices.rateGame();
game.playServices.unlockAchievement();
game.playServices.submitScore(score);
game.playServices.showScore();
game.playServices.showAchievement();
game.playServices.isSignedIn();


If you have any doubts, leave them in the comments section below.

How to obtain SHA1 Signing certificate fingerprint from Android Studio

Untitled-8

I’m pretty sure that looking at this pop-up for the first time would be intimidating. This is a simple method to extract the SHA1 fingerprint right from Android Studio without using keytool. If you have no idea what I’m talking about, read along and understand the whole process.

Steps to obtain the SHA1 fingerprint is at the end of this post.


What is a signing certificate ?

268751

Android requires that all apps be digitally signed with a certificate before they can be installed. Think of it like labeling your app as your own. You make a label with your name and stick it on your app, this ensures you are the rightful developer of the app. Only with the same signing certificate you can roll out future updates for your app, and for that reason you should never lose this certificate.

To further protect your app, this certificate is coupled with a digital key so that it remains reasonably unhackable.


What is a key store ?

The key store is basically a file containing all your cryptographic keys. All your certificates and corresponding keys are saved in this file encrypted.

There are 2 types of keystores

  1. Debug key store : This key store is generated by the Android SDK so that you don’t have to sign the app each time you deploy it for testing.
  2. Release key store : However you cannot use the debug key store when you want to publish the app. You have to generate your own release keystore and sign your app with a release key to publish your app.


How to create a release key  ?

Open up Android Studio. Goto Build > Generate Signed APK

First let’s create a new key store. Click on Create new

Untitled-5

A new dialogue box pops-up.

Untitled-6

Key store path: Make sure you give a secure location. You do not want to lose it. I repeat, you do not want to lose it!

Key store Password: This password is for the key store file, remember you can use the same keystore for storing all your keys for your various app(s). So this is like a master password.

Key Alias: Name this as <your app name>+’Key’ or something. This is specific to this signing key for this app. ( This is the equivalent of a  key in a hashtable )

Key Password: This password is specific to this signing key for this app. You can very well use the same password used for the keystore.

Validity: Give it say, 100 years!

Certificate: You are required to fill in at least one entry in this.

Click OK and proceed with the build.

Untitled-7

Make sure you choose the Build Type as release and click Finish


Deploy in release mode

Untitled-9

The release key signed APK is generated, but this does not deploy it on the device/emulator like it normally would. To do that, Goto File > Project Structure

In the left, under Modules, choose android

Untitled-10

Choose the Signing tab, click on the green + button and fill in the details, which you gave when you created the release key. The default configuration name is config. Let it be.

Go to Build Types, Choose release

Untitled-14

In the Signing Config option, choose config. Click on OK.

To use the release signing key when deploying the app, click on the tiny square found at the bottom left of Android Studio and choose Build Variants

Untitled-13

In the Build Variants sidebar, choose release. From now on, whenever you deploy the app, the signed version  with your release key is pushed on to the device/emulator.

But when you deploy it for the first time, you will encounter this error.

Untitled-18

This is because of the conflicting signatures for the same package. Click on OK and the release build will be pushed.


What is a SHA1 fingerprint ?

SHA1 stands for Secure Hash Algorithm One. A one-way cryptographic function that can be used to act as a ‘signature’ for a sequence of bytes. It is very unlikely that 2 different byte sequences would produce the same value (though not impossible). So instead of shipping the app with the entire key store and uploading a copy of it to the playstore, we use this cryptographic signature to easily validate the authenticity. Read more about SHA1 here.


Obtain the SHA1 fingerprint

Important : Run your app in release mode once before proceeding.

Click on Gradle ( or SBT ) found on the top right of Android Studio. First time you open it, it’ll be blank, click on the refresh button and it’ll list the name of your project ( My project name is Segments ).

Untitled-15

Expand the tree like this and double click on Signing Report

Untitled-16

Voila! you find the SHA1 fingerprint of both the release key and the debug key.

Untitled-17

You can even use the debug key SHA1 for testing Google API services. Just make sure that the app accessing this API is signed with the same key as that provided to authorize the app.


An unexpected error occurred. Please try again later. (480000x)

You might get this error when you submit the SHA1 fingerprint, this happens when you use the same fingerprint+package combination as a new linked app. Go to your developer console and delete any duplicates projects that you may find. Deletion takes 7 days though.


JNI ( Java Native Interface ) for C/C++ with examples

When writing applications in Java, there are times when Java alone fails to meet the needs of an application. You might want to use a feature not present in the standard Java class library or you might just want to use an existing library written in some other language. That’s where JNI comes in.

I found that most of the online documentation on JNI seems pretty scattered and obsolete. Therefore the scope of this post is to show you how to implement JNI with simple examples for :

  • Writing a HelloWorld in C and calling it from Java
  • Passing Integers and Strings from C to Java
  • Passing object Arrays from C to Java

The same can be implemented with C++ too. Note the modification mentioned in step 4 below.

Clone all the examples from Git


HelloWorld from C

1. Write the Java code

//HelloWorld.java

public class HelloWorld 
{
  native void cfunction();//Declaring the native function
                            
  static
  {
     System.loadLibrary("forhelloworld");//Linking the native library
  }                                      //which we will be creating.

  public static void main(String args[]) 
  {
     HelloWorld obj = new HelloWorld();
     obj.cfunction();//Calling the native function
  }
}

2. Compile the Java code and generate the class file


javac HelloWorld.java

3. Generate a Header file from the class file


javah HelloWorld

This will generate a file HelloWorld.h which contains :

//HelloWorld.h

/* DO NOT EDIT THIS FILE - it is machine generated */
#include <jni.h>
/* Header for class HelloWorld */

#ifndef _Included_HelloWorld
#define _Included_HelloWorld
#ifdef __cplusplus
extern "C" {
#endif
/*
 * Class:     HelloWorld
 * Method:    cfunction
 * Signature: ()V
 */
JNIEXPORT void JNICALL Java_HelloWorld_cfunction
  (JNIEnv *, jobject);

#ifdef __cplusplus
}
#endif
#endif

3. Obtain the JNI function signature from the header file

  1. These 2 lines make up the function header :
JNIEXPORT void JNICALL Java_HelloWorld_cfunction
(JNIEnv *, jobject);

Even if we declare native functions with no arguments, the JNI function signature still holds 2 arguments, they are:

  • JNIEnv * : A pointer referencing all the JNI functions
  • jobject     : An equivalent of this pointer

4. Write the native code using the function signature

  • Add the header file jni.h
  • Instead of the main() function, use the function signature obtained from the previous step.
  • Add argument variables for JNIEnv (env) and Jobject (jobj).
  • IMPORTANT :: If the native code is in C++, please note the only modification to be made is that the JNI functions should be called as env->func_name() instead of (*env)->func_name(). That is because C uses structures while C++ uses classes.
//HelloWorld.c
 
#include <jni.h>
#include <stdio.h>
 
JNIEXPORT void JNICALL Java_HelloWorld_cfunction
(JNIEnv *env, jobject jobj)
{
   printf("\n > C says HelloWorld !\n");
}

5. Generate the library file from the native code

gcc -o libforhelloworld.so -shared -fPIC -I (PATH TO jni.h header) HelloWorld.c -lc 
  •     libforhelloworld.so is the name of the native library you are going to create, it should be named as “lib”+(the library name used in the load library statement within the java code)
  •     -fPIC is some sort optimization for loading the machine code into the RAM, gcc requested this flag to be set. Might not be required for all systems.

If you don’t specify the path correctly you will encounter this error :

HelloWorld.c:1:17: fatal error: jni.h: No such file or directory
 #include <jni.h>
                 ^
compilation terminated.

It is usually present inside

/usr/lib/jvm/default-java/include

or

/usr/lib/jvm/java-1.7.0-openjdk-amd64/include

depending upon the version of Java you have installed in your system.

6. Place the library file in the standard /usr/lib folder

If the previous command executed successfully, it would have generated a file libforhelloworld.so . Conventionally this library file need not be placed anywhere else, it needs to reside in the current working directory.

But for that to work you need to have set the JAVA_PATH variables correctly, in most cases they won’t be set correctly. An easy hack to this would be to just place it inside /usr/lib

sudo cp libforhelloworld.so /usr/lib

If you don’t place the library file, you would encounter this error :

Exception in thread "main" java.lang.UnsatisfiedLinkError: no forhelloworld in java.library.path
        at java.lang.ClassLoader.loadLibrary(ClassLoader.java:1886)
        at java.lang.Runtime.loadLibrary0(Runtime.java:849)
        at java.lang.System.loadLibrary(System.java:1088)
        at HelloWorld.<clinit>(HelloWorld.java:9)

7. Execute the Java application

java HelloWorld

If you’ve followed all the steps correctly, C would greet the world 😀

 > C says HelloWorld !


PASS INTEGERS FROM C TO JAVA

Example : Write a Java program to find the factorial of a number. Pass the number as an argument from Java to a native function in C which returns the factorial as an integer.

Java code

//factorial.java
 
import java.util.Scanner;
 
public class factorial
{
  native int fact(int num);
 
  static
  {
        System.loadLibrary("forfact");
  }
 
  public static void main(String args[])
  {
        Scanner inp = new Scanner(System.in);
 
        System.out.println(" > Enter number :: ");
        int num = inp.nextInt();
 
        factorial obj = new factorial();
 
        System.out.println(" > The factorial of "+num+" is "+obj.fact(num));
  }
}                                                                                                         

C code

//factorial.c
 
#include <jni.h>
#include <stdio.h>
 
JNIEXPORT jint JNICALL Java_factorial_fact
(JNIEnv *env, jobject jobj, jint num)
{
  jint result=1;
 
  while(num)
  {
        result*=num;
        num--;
  }
 
return result;
}


PASS STRINGS FROM C TO JAVA

Example : Write a Java program to reverse a given string. Pass the given string as an argument from Java to a native function in C which returns the reversed string.

Java code

//reverse.java
 
import java.util.Scanner;
 
public class reverse
{
  native String reversefunc(String word);
 
  static
  {
        System.loadLibrary("forreverse");
  }
 
  public static void main(String args[])
  {
        Scanner inp = new Scanner(System.in);
 
        System.out.println(" > Enter a string :: ");
        String word = inp.nextLine();
 
        reverse obj = new reverse();
 
        System.out.println(" > The reversed string is :: "+obj.reversefunc(word));
  }
}

C code

//reverse.c
 
#include <jni.h>
#include <stdio.h>
 
JNIEXPORT jstring JNICALL Java_reverse_reversefunc
(JNIEnv *env,jobject jobj,jstring original)
{
  const char *org;
  char *rev;
 
  org = (*env)->GetStringUTFChars(env,original,NULL);
 
  int i;
  int size = (*env)->GetStringUTFLength(env,original);
   
  for(i=0;i<size;i++)
        rev[i]=org[size-i-1];
 
  rev[size]='\0';
 
return (*env)->NewStringUTF(env,rev);
}


PASS INTEGER ARRAYS FROM C TO JAVA

Example : Write a program that generates the first n Fibonacci numbers. Pass ‘n’ as an argument from Java to a native function in C that returns the Fibonacci numbers as an integer array.

Java code

//fibonacci.java
 
import java.util.Scanner;
 
public class fibonacci
{
  native int[] returnfibo(int n);
 
  static
  {
        System.loadLibrary("fibonacci");
  }
 
  public static void main(String args[])
  {
        Scanner inp = new Scanner(System.in);
 
        System.out.println(" > Enter n :: ");
        int n = inp.nextInt();
 
        fibonacci obj = new fibonacci();
        int[] Fibo = obj.returnfibo(n);
 
        System.out.println(" > The first "+n+" fibonacci numbers are :: ");
 
        for(int i=0;i<n;i++)
          System.out.print(Fibo[i]+",");
  }
}

C code

//fibonacci.c
 
#include <jni.h>
#include <stdio.h>
 
JNIEXPORT jintArray JNICALL Java_fibonacci_returnfibo
(JNIEnv *env,jobject jobj,jint n)
{
  jintArray fiboarray  = (*env)->NewIntArray(env,n);
 
  int first=0;
  int second=1;
  int next;
  int i;
  int fibo[n];
 
  for(i=0;i<n;i++)
  {
        if(i<=1)
          next = i;
        else
        {
          next = first + second;
          first = second;
          second = next;
        }
 
        fibo[i] = next;
  }
 
  (*env)->SetIntArrayRegion(env,fiboarray,0,n,fibo);
 
return fiboarray;
}


PASS STRING ARRAYS FROM C TO JAVA

Example : Write a Java program that displays the days of the week, which are passed from a native function in C.

Java code

//daysofweek.java
 
public class daysofweek
{
  native String[] returndays();
 
   static
   {
      System.loadLibrary("daysofweek");
   }
 
   static public void main(String args[])
   {
 
      daysofweek obj = new daysofweek();
      String[] days = obj.returndays();
 
      System.out.println(" > The days of the week are :: ");
      for(String name: days)
        System.out.println(name);
   }
}

C code

//daysofweek.c
 
#include <jni.h>
#include <stdio.h>
 
JNIEXPORT jobjectArray JNICALL Java_daysofweek_returndays(JNIEnv *env, jobject jobj)
{
 
  char *days[]={"Sunday",
                "Monday",
                "Tuesday",
                "Wednesday",
                "Thursday",
                "Friday",
                "Saturday"};
 
  jstring str;
  jobjectArray day = 0;
  jsize len = 7;
  int i;
 
  day = (*env)->NewObjectArray(env,len,(*env)->FindClass(env,"java/lang/String"),0);
   
  for(i=0;i<7;i++)
  {
    str = (*env)->NewStringUTF(env,days[i]);
    (*env)->SetObjectArrayElement(env,day,i,str);
  }
   
return day;
}

As you can see, the C code is returning an array of char pointers (C strings), while the Java code is expecting an array of Java Strings. But you don’t have to worry about that, the good old implicit conversion comes to the rescue 🙂

DALVIK vs A.R.T ( Android Run Time )

Android [4.4] KitKat users would have noticed the new option to choose the default run-time environment in Android (Dalvik or ART). Dalvik has been the run-time environment in Android since the very beginning. Although ART was added as an experimental feature in Kitkat, it has now replaced Dalvik from Android [5.0] Lollipop.

Image1

WHAT IS RUN-TIME ?

When a software program is executed, it is in a run-time state. During this state, the program sends instructions to the computer’s processor to access the system resources. To do this, we have a run-time environment that executes software instructions when a program is running. These instructions translate the software code into machine code (byte code) that the computer is capable of understanding. In simpler terms, it means that all Android application files (APKs) are basically un-compiled instructions.

WHY ANDROID USES A VIRTUAL MACHINE ?

Android uses a virtual machine as its run-time environment to compile and run its applications. Unlike our Virtual Box, this virtual machine does not emulate the entire computer! Using a virtual machine ensures that the application execution is isolated from the core operating system, so even if the application contains some malicious code, it cannot directly affect the system. This provides stability and reliability for the operating system. This also provides more compatibility, since different processors use different instruction sets and architectures, compilation on the device ensures compatibility with the specific device.

HOW DALVIK WORKS ? WHY IT GOT REPLACED ?

Dalvik uses a JIT (Just-In-Time) compiler for its process virtual machine. Applications need a lot of resources to run. Taking up a lot of resource can slow down the system. But with JIT, the resources are fetched just when they are needed meaning the application gets compiled when they are launched and are loaded into RAM. But compiling the entire code when we launch an application takes a lot of time which translates into what we call lag. But the entire code is not compiled on every application-launch, rather the part of the code that is needed to run the application is compiled every time and gets stored in cache called as the dalvik-cache so it can be reused and this cache gets optimized with every compilation overtime and creates something like a tree of dependencies on every device.

Boss Android users would know that they have to wipe dalvik-cache  before they install a new ROM in their Android, that is because this tree of dependency now has to reconstructed for the new system in the ROM.

But if the compiled application that is loaded into RAM is manually killed, the whole process of compilation has to be done again. Over time, the dalvik-cache gets bigger and does not get cleaned and this takes up a lot of storage, which slows down the device.

HOW A.R.T SOLVES THIS ?

A.R.T uses AOT (Ahead-Of-Time) compiler. When an application is installed, the A.O.T compiler translates the entire code into machine code via compilation. So this means the application doesn’t need to compiled again and again. This makes the process of launching and using the application faster and smoother because the pre-compiled code (machine code) just needs to be executed and all the resources are readily available. Reducing the number of compilations also improves the battery life of the device. But compiling the entire code means installing the application will take more time and storage as well.

DOES IT REALLY MAKE A DIFFERENCE ?

Although on paper, A.R.T smokes Dalvik, it doesn’t make a huge difference as you would expect. Apps do launch faster and the performance is a tad better in A.R.T.

ART-performance-comparison-e1404425718598

Here’s a a slide shown on one of the I/O keynotes.

A.R.T may use the “Ahead-Of-Time” method of compilation, but I personally don’t think it is ahead of it’s time! Yes, it does make more sense, it might be the next right step towards a better Android. But it still uses a virtual machine and running applications through a VM would never be faster than running applications in native code!

This article featured in the June issue of the Open Source For You magazine.                View here

How to create BOSS boot animations for Android

Boot animation is the first thing you stare at when you power ON your Android device, so what’s a BOSS Android without a BOSS boot animation ? 😀

Here’s an example of what I created.

This is a tutorial on how to create boot animations from scratch using Adobe AfterEffects.

You could also use any of these alternative methods and proceed to Step 2.

  • Convert a video into boot animation [ here ]
  • Convert a GIF into boot animation [ here ]
  • Use a static image as boot animation


STEP 1 : CREATE YOUR BOOTANIMATION

Figure out the screen resolution of your Android. Create a new composition in AfterEffects with that specific resolution. Set the required duration for the animation.

1

Create your animation. Here’s a basic guide to animating in AfterEffects.

2

Here’s the interesting part, the boot animation is not stored in Android as a video file, rather it is saved frame by frame as image files.

Rendering the composition :

  • Set the Output Module format as PNG Sequence 
  • Output To a new folder with the naming sequence as [#####].png

3
 

STEP 2 : PACKAGING THE BOOT ANIMATION

After rendering the composition, the output folder will contain the animation stripped down to each frame as PNG images. Rename the output folder to folder1. If you want a part of the animation to loop, put those frames into another folder named folder2. Now place the folder(s) into another folder named bootanimation. i.e :


bootanimation
 ├───folder1 ( Main animation )
 └───folder2 ( Part that must loop )

 
To package the boot animation. Download this tool ( Windows binary ). MAC / UNIX users may use WINE.

Open the Boot Animation Creator. Choose the folder bootanimation.

4

Set the properties. Select the first line and click on edit.11

Now choose the appropriate resolution and framerate as set in the AfterEffects composition. 8

Click on Add loop and choose folder1.

6

If the number of loops is set to 0, that part will keep looping.

7

Click on next and save exactly as bootanimation.zip. Preview the animation using this tool. You could also create a shutdown animation, follow the same steps and save exactly as shutdownanimation.zip. But mind you, shutdown animations wouldn’t last as long as boot animations, so make it short.
 

STEP 3 : INSTALLING THE BOOT ANIMATION

There are 3 ways to install the boot animation

  1. Using a root file explorer ( ROOT )
  2. Using ADB ( WITHOUT ROOT )
  3. Flashing a new ROM with the boot animation ( RECOVERY )

I recommend not to use 3rd party apps to install boot animations!
 

USING ROOT FILE EXPLORER

I recommend using ES file explorer. Press menu and set Root Explorer ON

Screenshot_2015-08-02-10-22-29

Place the bootanimation.zip in your phone storage, copy and replace it with the file in /system/media

Screenshot_2015-08-02-10-23-18

Long press the new bootanimation.zip and select properties.

Screenshot_2015-08-02-10-23-41

Tap on Change next to Permissions and set it like this

Screenshot_2015-08-02-10-23-47

You’re done ! Reboot the device to view the new boot animation.
 

USING ADB

Navigate to your adb binary folder and place the bootanimation.zip file there. Hold shift and right-click, open command window here. ( Here’s a noob guide to setting up basic adb )

Type the command :


adb push bootanimation.zip /data/local
adb reboot


FLASHING A NEW ROM WITH THE BOOT ANIMATION

Open up your ROM ZIP file and replace the bootanimation.zip file present in System > Media and flash the new ROM.
 
 
Leave a comment if you have any doubts. No matter how noob the question is, I’ll be glad to help 🙂

How to root Lava Iris X8

The other day I bought a new LAVA Iris X8 specifically for Android development and guess what, I rooted the device on the first day 😀

Here’s my rooted X8.

Untitled6
This is the most safest and noob-friendly method to root your X8. Yes, I have tested this method on my own device and I did not soft-brick it in the process. Screenshot_2015-04-01-21-44-32 > Will I receive the official Lollipop update ( as promised by LAVA ) even after I root my X8 ?                                                                                                                                       Yes, you will receive the update, but you’d probably lose root access after you install the update. But don’t worry, I will post a rooting tutorial right after the update is released.

> Will I void my phone’s warranty if I root my device ?                                                          Well, of course you will void your warranty 😀

DISCLAIMER :: I have tested this rooting method on my device, but I will not be responsible if you mess something up :/

Here we go,

STEP 1 : ENABLE USB-DEBUGGING IN YOUR PHONE

Goto Settings > About phone and keep tapping Build number until a toast message pops-up saying ” You are now a developer  ” Now, go back to Settings and you will find a new entry Developer options, inside it check USB debugging option. Untitled-3

STEP 2 : INSTALL ADB DRIVERS IN YOUR COMPUTER

I recommend using XP / Vista / 7 for this, because it is cumbersome to setup the drivers in Windows 8 / 8.1 and in most cases, the drivers would not get installed properly. Download the Driver package here This contains all the VCOM,USB and ADB drivers ( all that you need ), most of which are common to all Mediatek ( Your phone’s processor ) devices. After you download the rar file, extract it. Now goto Device Manager

  •  Right-click on My Computer > Properties > Device Manager

Under Other devices or Ports, you will find an entry of your device with the exclamation symbol like this.

  •  Right-click > Update Driver software

04-devmgr Choose the Browse option and locate the extracted folder, Windows will automatically identify the driver and install it. 05-browse

STEP 3 : INSTALL KINGO ROOT IN YOUR COMPUTER ( Download here )
Step 4 : CONNECT THE PHONE TO THE COMPUTER VIA USB AND ROOT

Make sure the computer has an active internet connection. Open the Kingo root application, it will automatically recognize the device and starts installing the necessary dependency drivers. Now click on ROOT, it will automatically start downloading the necessary root files and does everything for you. It takes a couple of minutes, the phone might do some reboots in the process, don’t panic ! On completion, it’ll say “Root succeeded” and you will find a new Kingo root icon in the app drawer.

Step 5 : INSTALL SUPERSU ( IF KINGO ROOT FAILS TO INSTALL IT )

Although Kingo root succeeded, it failed to install SuperSU in my X8. If you can’t find SuperSU in your app-drawer, follow this step. Download SuperSU from the playstore. Screenshot_2015-04-01-22-02-17 SuperSU prompts you to install it. Choose Normal mode, phone reboots after the installation is complete Untitled-5 After rebooting, SuperSU still won’t show up in the app drawer because it conflicts with the SuperSU package Kingo root tried to install, so you need to remove it.

  • Goto Settings > Apps > SuperSU > Uninstall updates

Screenshot_2015-04-01-21-46-44 Then reboot your device and you’re done. The next time an app requires root privileges, SuperSU will prompt your permission.

CUSTOM RECOVERY

Thanks to the folks at XDA, we finally have a custom recovery !

Download here ( Carliv Touch v3.3 )

You can flash the recovery by using either of these two :

  • Mobileuncle MTK tools ( without PC )
  • SP Flashtool

Mobileuncle MTK tools

  1. Place the recovery.img file in the root of your SD card.
  2. Download Mobileuncle MTK tools here
  3. Place the recovery.img file in the root of your SD card
  4. Open the application, grant root permissions
  5. Go into Recovery update, it will automatically find the recovery.img file
  6. Tap on it and choose OK for the prompt
  7. It will install the recovery and reboot into recovery

SP Flashtool

  1. Download the application here ( Windows )
  2. Just extract the ZIP file.
  3. Download Scatter-text file for the X8 here
  4. Open Flashtool.exe from the extracted folder, load the scatter-text file
  5. Choose the recovery.img file and click on Download
  6. Power-off the phone and connect the phone to the PC
  7. Wait for the magic ring to appear !
  8. Doesn’t make sense ? Follow this noob guide

To boot into recovery

  • Hold volume up + volume down + power button at OFF state
  • Use Mobileuncle MTK tools application and tap Reboot into Recovery
  • Use adb command  $ adb reboot recovery
CUSTOMIZE X8 LIKE A BOSS

Right now, there’s isn’t much development happening for the X8. I am currently working on porting a CWM recovery for this device. After a custom recovery has been ported, custom ROMs would soon be available, hopefully ! Until then, all you can do is customize the stock ROM with the Xposed Framework. Xposed framework allows you to customize the UI, system apps and provides awesome functionalities through modules that you never thought were necessary! Read here if you are interested to know how it works.

The best thing about Xposed is, it does all this without actually modifying the APKs, meaning that if you uninstall the framework, you will remove all the customizations you made. Make sure you uninstall Xposed Installer before you install the official Lollipop update from LAVA. Download Xposed here Open Xposed and tap on Install/Update in Framework ( provide root access ). Don’t panic after seeing this warning message, I’ve tested the installation on my device.

Untitled-4

The phone will reboot after the installation is complete. Xposed installer does not add any functionality by itself, you need to install modules for that. Head over to Download in Xposed Installer and choose the modules of your choice and make sure you download the Kitkat [KK] version of each module.

To use a module, enable it in Xposed Installer and reboot your device. Since we don’t have a custom recovery setup as of now ( which I am working on ). We cannot recover from soft-bricks ( Boot-loops ), so don’t install modules that may potentially soft-brick your device ! If none of the modules work, read this post

Xposed modules I’m using on my X8

  • Xui mod                          >   Awesome List animations
  • Greenify                          >   Epic battery saver
  • GravityBox                      >   UI customization
  • Tinted Status Bar            >   Change status bar color based on the app
  • Screen-off Animation      >   Well, duh !
CHANGE FONT

Download iFont from the playstore, ( provide root access ) it has a plethora of fonts lined up. Before you set a font, Goto Settings and choose the Change font mode as System mode(need ROOT) Untitled-6   Here’s a list of my Top 10 Root apps for Android, an article that featured in the 2015 February issue of the Open Source For You magazine. View here

STOCK ROM ( KITKAT 4.4.2 ) IS NOW AVAILABLE

Mirror 1 | Mirror 2

Leave a comment if you have any doubts, I’ll be glad to help 🙂

[ FIXED ] Waiting for response from Gravitybox system framework Error | Xposed modules not working

I have installed Xposed Framework on many devices and Gravitybox module is always my first download. The other day, I encountered an error when I opened Gravitybox after a fresh install on my new rooted Android device. When I opened the app, it said   waiting for response from gravitybox system framework “

I checked the framework, all the app_process and XposedBridge.jar bundles were active. I had a look in the log file and saw a framework error. Upon researching on how Xposed works, I understood that all modules are placed in the standard /data/app location, which is accessible at boot time.

So if you have an SD card in your device and you have the Default Write Disk set to SD card, you will encounter this error because, as I understand the SD card is mounted only after boot, meaning the modules placed in SD are not accessible at boot time.

FIX

Move all your Xposed modules to Phone Memory including the Xposed Installer app.

How to multi-boot like a BOSS with BURG bootloader

Fig1

If you are running multiple OSs in your machine, this would probably be the first screen you would be staring at when you turn ON your system. This is called GRUB, stands for GRand Unified Bootloader.

GRUB is a part of the GNU project. It is the default bootloader that comes with all UNIX-like OSs. GRUB provides a pretty basic menu to choose from a list of the installed OSs and the entries that come with it, such as recovery modes and memtests. Quite sadly, GRUB has remained pretty much the same over the years, it still offers the bash-like, command line interface from the stone age !

In other words, GRUB is plain boring 😀

This is where BURG comes in, the BRand-new Universal loadeR from GRUB, BURG is  a cool replacement to GRUB, it can turn your bootloader into this.

Fig2

INSTALLING BURG

First you need to add a new repository, enter the following command in the terminal

sudo add-apt-repository ppa:n-muench/burg
sudo apt-get update

Now you need to install BURG and some themes. For that type-in

sudo apt-get install burg burg-themes

 
SETTING UP BURG

When the installation proceeds, dialog boxes pop-up for configuration. Please follow these steps carefully.

Fig3

Fig4

Fig5

So now that we have successfully setup BURG, let’s clean up the BURG entries.

DISABLE MEMTEST OPTIONS

Read here if you are not sure what memtest is. To disable the memtest option, type in this command.

sudo chmod –x /etc/grub.d/20_memtest86+

Now let’s see how BURG looks like. We can emulate the BURG boot screen using this command.

sudo burg-emu

Use

  • F1 Help
  • F2 Change Theme
  • F3 Change Resolution
  • Arrow-keys to move

For now, just choose your theme, do not change the resolution. This is because, if your monitor doesn’t support that particular resolution you changed to, the next time you boot, you would get a blank screen and you would obviously freak out !

So press F3 during your next boot and choose the resolution by pressing enter, if you get a blank screen while doing so, move up/down and choose another resolution.

Fig6

In this machine, I have 3 OSs installed ( Ubuntu, Windows 8 and Linux Mint ). But you’d notice that there are 2 options each for Ubuntu and Linux Mint. Those are the recovery modes which I had mentioned at the beginning, it can be disabled easily. For that we need to edit the BURG configuration file. Open up the terminal and type- in the following command.

( Use text-editors of your choice )

sudo nano /etc/default/burg

Fig7

In this file we need to edit this line

#GRUB_DISABLE_LINUX_RECOVERY=&quot;true&quot;

You need to un-comment the line, by removing the ‘#’ character.

This file also contains the time-out period for the boot screen, if you want to change it. Locate this line and change the R-value which is in seconds .

GRUB_TIMEOUT=5

To save the changes made in nano editor

  • press ctrl-x
  • press y
  • press enter

Now we need to configure those changes into BURG and view the modified boot screen. For that type-in

sudo update-burg
sudo burg-emu

Fig10

Now the 2 extra recovery entries would be gone. That’s it. Enjoy booting with BURG !

To get more themes, visit deviantart

This article featured in the 2014 December issue of the Open Source For You magazine. View here